
Buying a paint booth is only half the job — the other half is installing it correctly. Poor installation causes 60% of first-year paint booth problems: airflow issues, dust contamination, filter clogging, electrical failures. This guide covers the 7 installation phases, the utility requirements, statutory approvals, and the commissioning tests you must pass before running your first job. Follow it and your paint booth will run smoothly for 15 – 20 years.
📋 Installation Phases
- Timeline & Cost Overview
- Phase 1: Site Preparation & Foundation
- Phase 2: Utility Connections
- Phase 3: Wall Panel & Structure Assembly
- Phase 4: Ducting & Fan Installation
- Phase 5: Electrical & Control Panel
- Phase 6: Filter Install & Airflow Balance
- Phase 7: Commissioning & Certification
- Statutory Approvals Required
- Top 10 Installation Mistakes to Avoid
1. Installation Timeline & Cost Overview
| Booth Type | Install Time | Install Cost (excl. equipment) |
|---|---|---|
| Small manual cross-draft booth | 5 – 7 days | ₹1 – 3 lakh |
| Medium semi-auto booth | 10 – 14 days | ₹3 – 7 lakh |
| Large downdraft booth with heating | 18 – 25 days | ₹8 – 18 lakh |
| Conveyorised industrial line + pretreatment | 4 – 6 weeks | ₹15 – 40 lakh |
| Automotive OEM tunnel line | 8 – 12 weeks | ₹40 lakh – 1.5 cr |
Installation cost is typically 15 – 25% of equipment cost. Timeline assumes site is ready (foundation cured, power drawn, utilities live). The three biggest sources of delay are: incomplete civil work (35%), late utility connection (25%), missing statutory paperwork (20%).
2. Phase 1: Site Preparation & Foundation
1Foundation Design
RCC slab minimum 200 mm thick with M25 concrete for small booths, 300 mm M25 for large downdraft, 450 mm M30 for downdraft pit booths. Reinforcement: 12 mm bars at 150 mm spacing both ways. Cure 14 – 28 days before erection.
2Level Tolerance
Check level with laser instrument — ±3 mm across full booth footprint. Anything worse causes door misalignment, panel warping and filter frame stress.
3Drainage & Slope
1% slope to central sump for water-wash booths; central drain for downdraft-pit booths. Epoxy floor coating (chemical-resistant, 3 mm thick) recommended for pretreatment area.
Foundation Ready Checklist
- RCC slab poured to spec thickness
- Cured minimum 14 days (28 days for M30)
- Level within ±3 mm laser-measured
- Drainage sump & sloped floor complete
- Anchor bolt pattern marked per booth drawings
- Site cleared of debris, dust and standing water
3. Phase 2: Utility Connections
Utility work must be complete before equipment delivery — waiting for the electrician after the booth arrives adds 1 – 3 weeks to your timeline.
| Utility | Small Booth | Medium Booth | Large Downdraft |
|---|---|---|---|
| Electrical (3-phase 415V) | 15 – 25 kW | 45 – 80 kW | 120 – 300 kW |
| Compressed air (7 bar clean/dry) | 8 – 15 CFM | 40 – 80 CFM | 150 – 300 CFM |
| Water | 50 – 200 LPD | 200 – 800 LPD | 800 – 2,000 LPD |
| Gas / LPG (if gas oven) | — | 20 – 40 kg/day | 50 – 100 kg/day |
| Exhaust discharge | 3 m above roof | 3 m above roof | 6 m above roof |
4. Phase 3: Wall Panel & Structure Assembly
1Panel Unpacking & Inspection
Check every panel for shipping damage before assembly. Note any dents, scratches or bent frames on the delivery challan.
2Assembly Sequence
Start with corner panels, then long walls, then short walls, then roof panels. Use gasket seals between all panel joints and torque M10 bolts to 40 – 50 Nm.
3Door Fitting
Doors installed last after wall panels are square. Check hinge alignment, door seal contact around full perimeter, latch engagement. Doors must open/close silently and seal tightly.
4Verticality Check
Plumb bob every 3 m along walls — verticality within ±3 mm over 3 m height. Anything worse indicates foundation is out of level and needs correction.
5. Phase 4: Ducting & Fan Installation
Ducting mistakes cause 40% of airflow problems. Follow spec exactly:
- Material — GI 22 SWG for standard exhaust, SS304 for corrosive VOC streams, PP-lined for chemical vapours.
- Velocity — 12 – 18 m/s to prevent paint deposit and duct fouling.
- Insulation — 50 mm rockwool with GI cladding on all heated ducts to prevent condensation drip and heat loss.
- Slope — 1:100 towards drain for water-wash exhaust.
- Access panels — every 3 m for cleaning access.
- Fire dampers — mandatory at wall penetrations per NBC 2016.
- Discharge stack — minimum 3 m above roof line and 8 m from any air intake.
- Sealing — every joint gasketed + silicone sealed. Leakage above 5% wastes fan energy and creates negative-pressure hot spots.
Cost ₹3,500 – 6,500 per running metre for 800 mm dia GI duct installed.
6. Phase 5: Electrical & Control Panel
1Panel Mounting
Control panel mounted outside booth in dust-free, ventilated area. Minimum 1 m clearance in front for maintenance access.
2Motor Wiring
Fan motors, supply air unit, heater bank — all wired to panel with proper cable sizing, MCB protection and thermal overload relays. Use armoured cable for underground runs.
3Safety Interlocks
Door interlock (fan must run when door closed), airflow proving switch (heater cannot fire without airflow), high-temperature limit, emergency stop, fire alarm interface — all wired and tested before energising heater.
4Lighting
Explosion-proof IP65 LED fixtures, minimum 800 lux at operator working height. Emergency battery-backup lights for safe egress.
7. Phase 6: Filter Install & Airflow Balance
Airflow balance is the make-or-break test — get this wrong and every subsequent paint job fails.
- Install supply and exhaust filters per design spec (F5/F7 supply, paint arrestor exhaust)
- Run supply and exhaust fans at full speed for 30 minutes to stabilise
- Measure velocity at booth face using vane anemometer at 9 points (3×3 grid pattern)
- Target airflow: cross-draft 0.4 – 0.6 m/s, downdraft 0.3 – 0.4 m/s at operator breathing level
- Verify slight positive pressure 5 – 10 Pa above ambient (prevents dust entry)
- Record filter differential pressure gauge readings — baseline for future comparison
- Test airflow with door open and closed — variation must be < 15%
- Issue commissioning certificate with all readings and calibration traceability
Use the readings as reference — when future maintenance is needed, comparing new readings to commissioning baseline instantly diagnoses filter, fan or duct issues.
8. Phase 7: Commissioning & Certification
Final commissioning proves the booth meets its specification and can safely produce your paint quality target.
- Temperature ramp test — verify heater brings booth to 60 – 80 °C in specified time
- Temperature uniformity — 9-point survey shows < ±5 °C variation across booth volume
- Pressurisation cycle — confirm booth holds slight positive during application
- Safety interlocks — force-test each interlock trip point and verify shutdown
- Emergency stop — verify full shutdown within 3 seconds
- Trial paint job — spray a full workpiece, inspect finish quality, take photos
- Operator training — 4 – 8 hours covering safe operation, filter maintenance, alarm response
- Documentation — commissioning report, calibration certificates, warranty registration
9. Statutory Approvals Required
Operating a paint booth without approvals is a factory-shutdown risk. Complete these before commissioning:
- State Pollution Control Board (PCB) — Consent to Establish and Consent to Operate under Air Act 1981 and Water Act 1974
- CPCB emission compliance — CPCB 2026 norms compliance certificate
- Factory License — under State Factories Act if factory size exceeds threshold
- Fire Department NOC — from local fire brigade
- PESO approval — Petroleum & Explosives Safety Organisation for > 100 L flammable storage
- Electrical Inspector approval — installations above 25 kW
- Insurance survey — property + public liability coverage before first operation
Total approval timeline 60 – 120 days. Start paperwork the day you sign the equipment PO. Autocoat provides all documentation templates and follow-up support.
10. Top 10 Installation Mistakes to Avoid
- Insufficient foundation — causes vibration, fan failure, filter frame damage
- Undersized electrical panel — triggers overheating, trip-outs, motor damage
- Wrong exhaust duct size — reduces airflow 30% and causes chronic paint defects
- No slope in water-wash floor — standing water, rust, bacterial growth
- Compressed air line contamination — fisheyes and paint defects (always use SS304)
- Missing safety interlocks — operator injury risk and PCB violations
- Inadequate lighting — operator eyestrain, missed defects, poor finish quality
- No filter access provision — hours of downtime for every filter change
- Skipping air balance test — dust contamination from day one
- No emergency stop and fire suppression — insurance rejection and safety failure
All ten are traceable to poor installation planning. Autocoat's 7-phase installation protocol eliminates every one.
Need Professional Paint Booth Installation?
Autocoat has commissioned 375+ paint booths across India, UAE, Saudi Arabia and Bahrain. Turnkey site-prep-to-certification with all licensed technicians and statutory documentation included.
Get Installation Quote →Frequently Asked Questions
How long does paint booth installation take?
Small manual booth 5 – 7 days; semi-auto 10 – 14 days; large downdraft with heating 18 – 25 days; conveyorised industrial 4 – 6 weeks; automotive OEM tunnel 8 – 12 weeks. Assumes site is ready.
What foundation is required for paint booth?
RCC slab 200 mm M25 for small booths, 300 mm M25 for large downdraft, 450 mm M30 for downdraft pit. Level ±3 mm, cure 14 – 28 days.
What utility connections does a paint booth need?
3-phase 415V (15 – 300 kW), compressed air 7 bar clean/dry (8 – 300 CFM), water 200 – 2,000 LPD, gas if oven, exhaust duct to 3 m above roof. Complete utilities BEFORE equipment arrives.
How much does paint booth installation cost in India?
15 – 25% of equipment cost. Civil ₹800 – 2,500/sq m, electrical ₹600 – 1,800/kW, ducting ₹3,500 – 6,500/rm, statutory approvals ₹25,000 – 1.5 lakh, commissioning 3 – 8% of equipment cost.
What safety approvals does a paint booth need in India?
PCB Consent to Establish and Operate; CPCB 2026 emission compliance; Factory License; Fire NOC; PESO for flammable storage; Electrical Inspector for > 25 kW; insurance survey. Total 60 – 120 days.
How do I test paint booth airflow after installation?
Run fans 30 min, measure velocity at 9-point grid using vane anemometer. Target 0.4 – 0.6 m/s cross-draft, 0.3 – 0.4 m/s downdraft. Verify +5 – 10 Pa pressurisation. Record baseline for future comparison.
What ducting is required?
GI 22 SWG (standard), SS304 (corrosive VOC), PP-lined (chemical). Velocity 12 – 18 m/s, insulation 50 mm rockwool on heated ducts, access panels every 3 m, fire dampers at wall penetrations, discharge 3 m above roof.
What are the top installation mistakes to avoid?
Insufficient foundation; undersized electrical; wrong duct size; no floor slope; contaminated compressed air; missing interlocks; inadequate lighting; no filter access; skipping air balance; no fire suppression.
Do I need a licensed technician?
Yes — licensed electrical contractor (B/C class), certified welder, gas fitter, fire safety consultant, chartered engineer for approvals, OEM technician for booth erection. DIY is illegal for commercial and voids warranty.
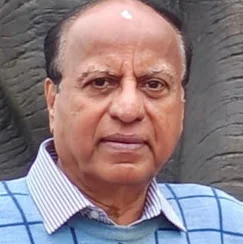
About the Author
Umesh Prabhu — Founder & Managing Director, Autocoat Engineering India Pvt Ltd
Umesh Prabhu is a mechanical engineer, industrial consultant, and founder of Autocoat Engineering India Private Limited. With over 40 years of experience in industrial painting and surface finishing, he specializes in industrial paint shops, powder coating systems, automated painting solutions, paint booths, and energy-efficient plant design. His industry experience includes working with leading automotive and manufacturing companies such as Tata Motors and Bajaj Auto.
Connect on LinkedIn